Mac Mail Setup (Tiger)
OS X Mail Setup version 10.4 or lower
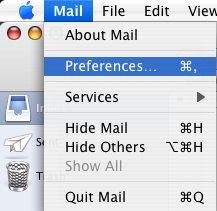
With the Mail program open select Preferences under the Mail menu.
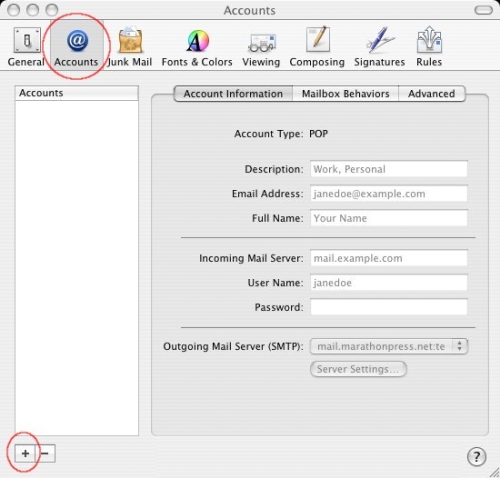
Make sure you are on the Accounts tab and click the + button at the bottom left-hand corner of the screen to Add new email account.
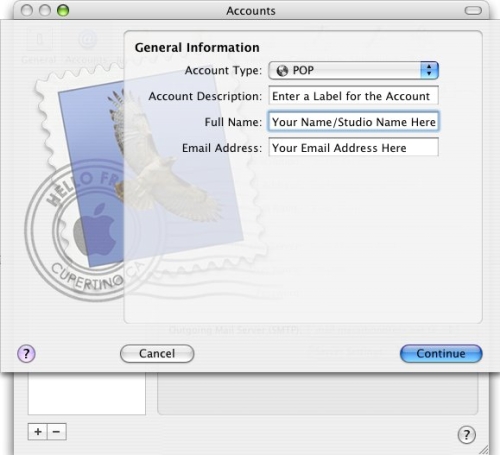
In the Accounts window under General Information, enter your information as follows:
Account Type: POP
Account Description: Enter a Label for this account.
Full Name: Enter your name or your business name.
Email Address: Make sure and enter your full email address such as example@your domain name.
Click Continue.
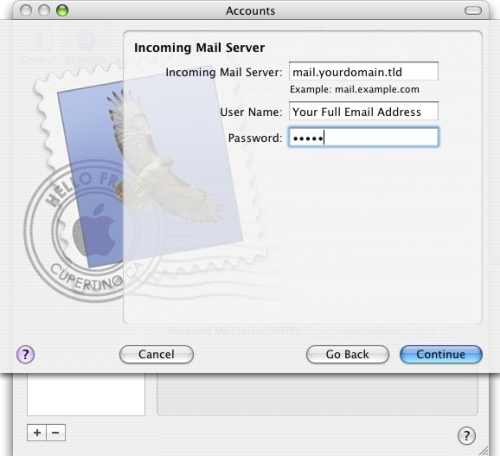
Under the Incoming Mail Server enter your information as follows:
Incoming Mail Server: mail.your domain name
User Name: Make sure and enter your full email address. example@your domain name.
Password: Enter the password you were given when your account was setup.
Example: If your domain name was marathonpress.com you would enter mail.marathonpress.com.
Click Continue.
Mail will perform a test of the Incoming Mail Server settings.
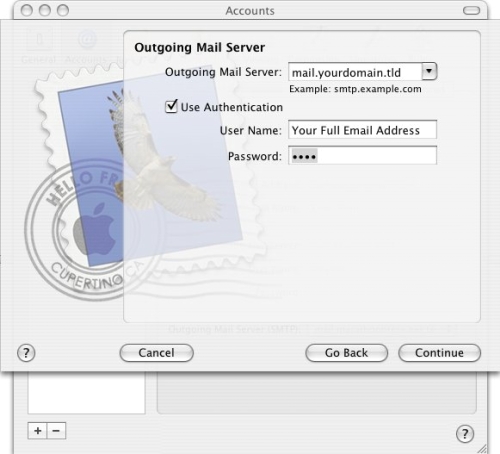
Once the test is complete, verify that the Use Authentication checkbox is checked.
User Name: Make sure you enter your full email address example@your domain name.
Password: Enter the password you were given when the account was setup.
Click Continue.
Mail will perform a test of the Outgoing Mail Server settings.
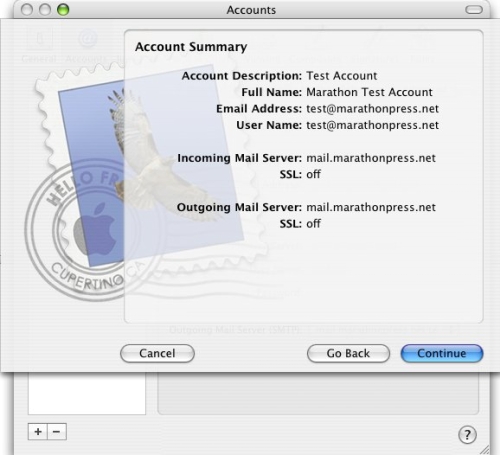
Once the test is complete, the Account Summary screen will be displayed.
Please review your settings, make sure there are no typos.
SSL should be off for both Incoming and Outgoing Mail Servers.
Click Continue.
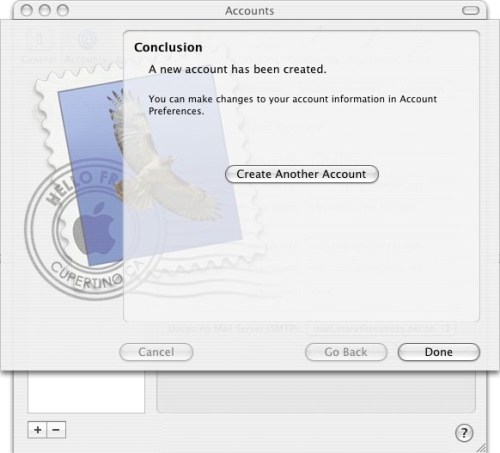
Click the Done on the Conclusion screen.
You should be back at the main Mail window. To receive mail click the Get Mail button.
Next we need to check a few advanced Incoming and Outgoing settings and modify them if needed.
Click on Preferences under the Mail menu up by the Apple.
Go to the Accounts tab and select the email account you just created in the left side bar under Accounts.
On the right-hand section, click on the Account Information tab.
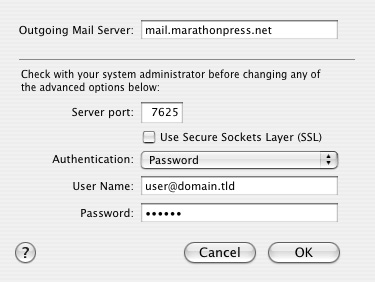
Under Outgoing Mail Server (SMTP): at the bottom click Server Settings.
Verify your Outgoing Mail Server is mail.your domain name, if your domain name was marathonpress.com you would enter mail.marathonpress.com.
Change the default Server Port from 25 to 7625.
Make sure that Use Secure Sockets Layer (SSL) in unchecked.
Click OK.
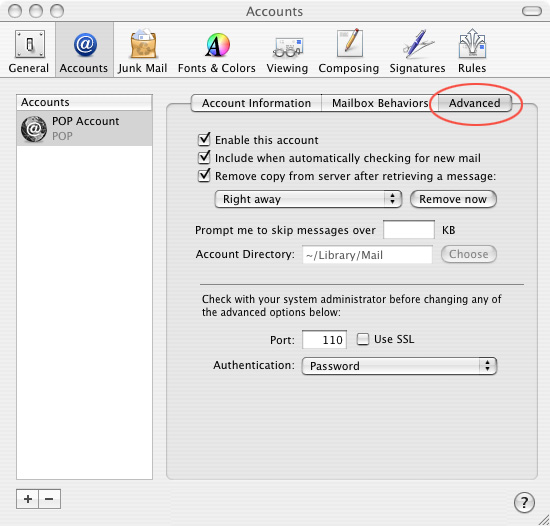
While still in the Accounts window click on the Advanced tab.
Settings should be similar to the window below.
Make sure Use SSL is unchecked.
Click the General tab in the upper left of the Accounts window to save your settings.
That’s it, your account should now be working properly.

