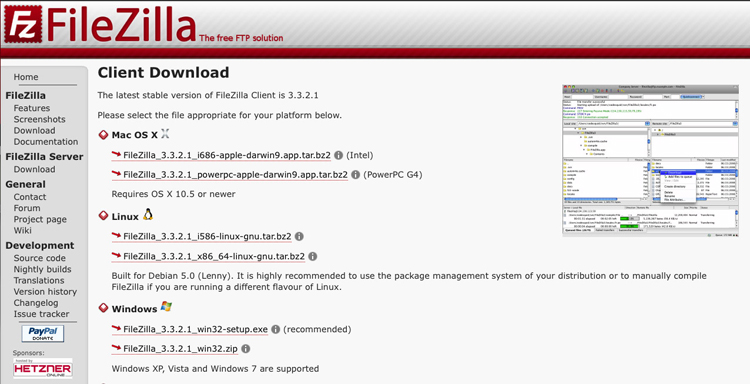
Step 1: Download and Install FileZilla – When you download the setup file, choose to Run the file instead of Save.

Step 2: Configure FTP Settings
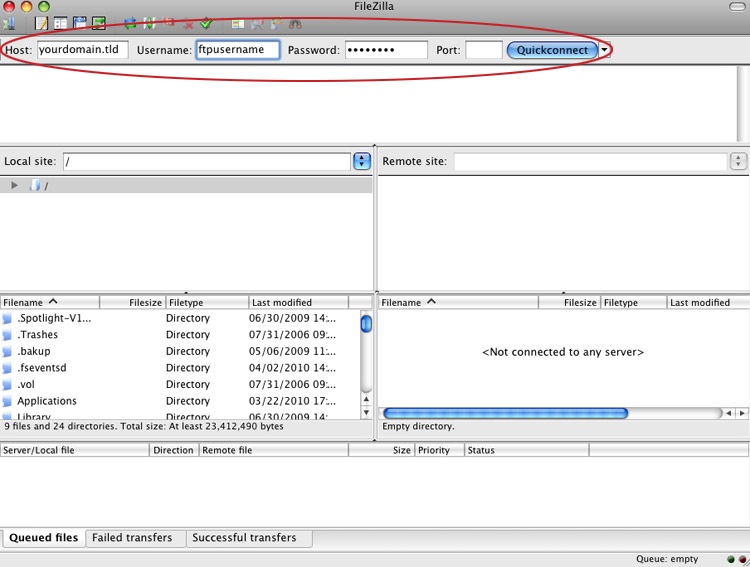
2.1 Enter the following information:
- Host: yourdomain.tld (without the “www.”)
- Username: [your FTP username]
- Password: [your FTP password]
- Port: 22

2.2 Click Quickconnect.
If you see “Status: Directory listing successful” congratulations, you’re connected to your website via FTP!

Step 3: Save FTP Settings
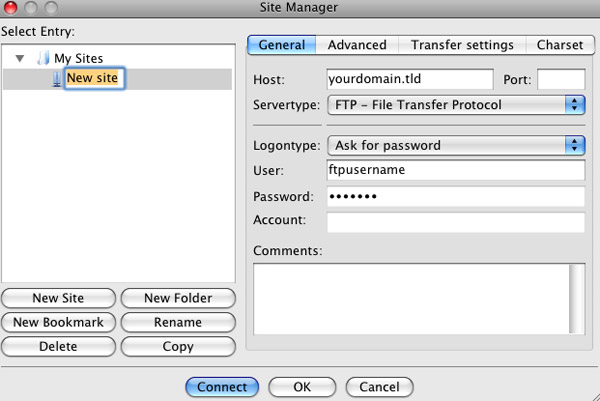
- Click File menu > Copy current connection to Site Manager…
- Type a name for this connection – such as your domain name
- For security of your FTP login, at the “Logontype:” to the right we recommend setting this to ‘Ask for password‘. If you want your computer to remember your FTP password, then you may change this to ‘Normal’ but this isn’t as secure
- Click OK

Once you have logged into the server, on the bottom right window, go to public_html
In public_html, double-click on “proofs”
You will need to upload your session to this folder.
The left hand side of the screen is your computer. Just find the folder that you created for this session, select it and then right click and select Upload.
After the upload is finished, you will need to go to your Marketing Control Site and login with the credentials that were e-mailed to you. If you do not have these credentials, give us a call at 1.800.228.0629 to retrieve them or have them reset.
Once you are logged into your Marketing Control Site, click on “Web” in the top right hand corner.
Next, click on “Session Proofing”
Next, click on “Sessions”
This list will show you all the sessions that are currently uploaded to the server. Find the name of the session you just uploaded, and click the “Refresh” button next to the number 0 by the name. Once this is done, the session will be ready to go.
If you encounter any errors, or the session name is not showing up for you, please feel free to call us Monday-Friday 8am-5pm (CST) at 1.800.228.0629
