
Gmail Setup
Get started by signing in to your gmail account.
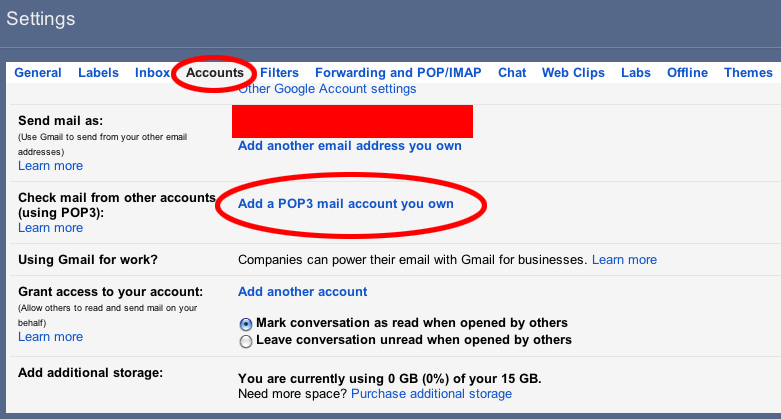
Click on the Settings link in the top right corner of your Gmail account under the gear icon.
Click on the Accounts tab. When the new window opens click on Add POP3 email account.
A smaller window will appear, enter your Marathon-hosted email address in the Email Address field and click the Next Step button.

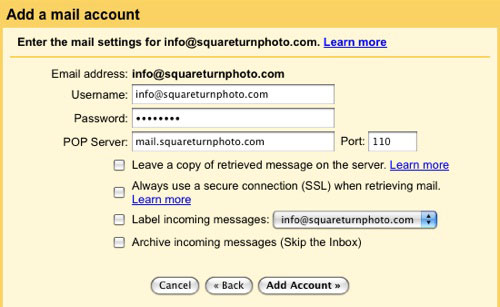
Enter your email settings. Your username is your full email address. Enter the password your Marathon Representative gave you in the Password field. In the POP Server field enter mail.your domain name, if your domain name was marathonpress.com you would enter mail.marathonpress.com. All the boxes should be left unchecked. Then click the Add Account>>button.
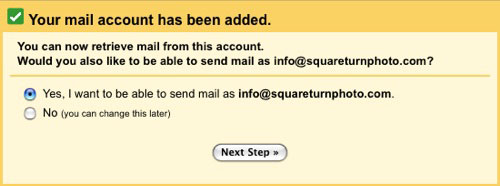
If you see a screen similar to the image below, your email account has been successfully added to your Gmail account. If you would like to be able to send email using your Marathon-hosted email account from within Gmail, choose Yes, I want to be able… and click the Next Step >> button.
Enter your name or business name as you’d like it to appear when someone receives an email from you and then click the Next Step >> button.

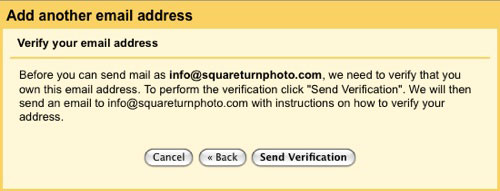
When you see the screen below, click the Send Verification button. Next, check your email INBOX for a message from Gmail. Click the verification link within that email message to verify your account.
When you click the verification link mentioned above, you should see a “Confirmation Success!” screen. If so, you’re done! Now your Gmail account will check your Marathon-hosted email account for you.
For more Gmail support use the following link to visit their website.