
Step 1: Enter Your Information
Your full name or business name
Your full e-mail address
Your e-mail address password

Step 2: Add Incoming Server Information
Your incoming mail server
Your full e-mail address
Your e-mail address password
Forgot your password?
Your name or business name
Step 3: Enter Outgoing Server Information
Your name or business name
Your outgoing mail server
Your full e-mail address
Your e-mail password
Step 4: Account Summary
Make sure your e-mail address and
username are the same
Make sure your Incoming Server and
Outgoing Server are the same
Make sure “Take account online” is checked
Click ‘Create’
Mac Mail Setup (Leopard)
OS X Mail Setup Version 10.5
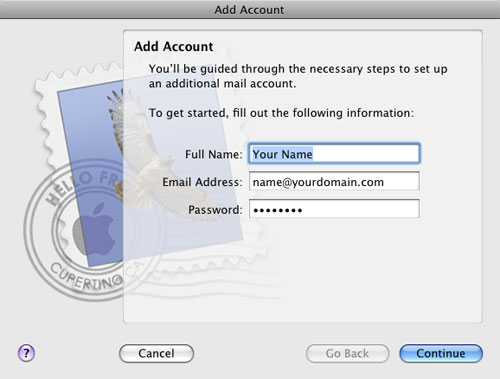
With the Mail program open select Add Account under the File menu, this should launch the wizard.
Enter the following information.
Full Name: Enter your name or your business name.
Email Address: Enter your full email address, example@your domain name.
Click Continue.
Incoming Mail Server Settings
Enter the following information.
Account Type: POP
Description: Enter a Label for this account.
Incoming Mail Server: Enter mail.your domain name.
User Name: Enter your full email address example@your domain name.
Password: Enter the password you were given.
Click Continue.
Incoming Mail Security
The Incoming Mail Security window will only show up if the attempt to detect the settings fails. If you see it, enter the following .
Uncheck the box for Use Secure Sockets Layer (SSL).
In the Authentication drop-down menu select Password for Authentication.
Click Continue.
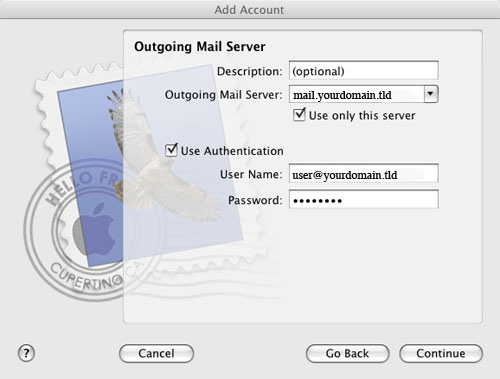
Outgoing Mail Server Settings
To configure the Outgoing Mail Server, enter the following information.
Description: May be left blank or type in your name or business name.
Outgoing Mail Server: Enter mail.your domain name. Example – marathonpress.com would be mail.marathonpress.com.
Check the box next to Use only this server.
Check the box next to Use Authentication.
User Name: Enter your full email address example@your domain name.
Password: Enter the password you were given.
Click Continue.
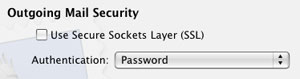
Outgoing Mail Security
The Incoming Mail Security window will only show up if the attempt to detect the settings fails. If you see it, enter the following .
Uncheck the box for Use Secure Sockets Layer (SSL).
In the Authentication drop-down menu select Password for Authentication.
Click Continue.
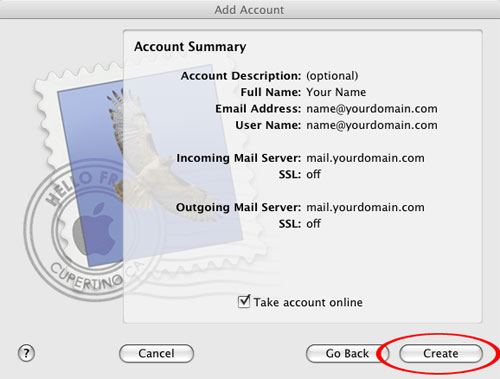
Account Summary
The window summarizes the settings that you have made. It should look like the graphic below.
Check the Take account online box to receive mail as soon as you click Create.
Click Create.
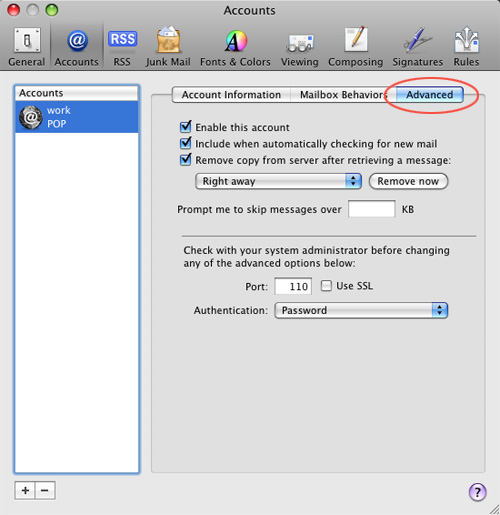
Next we need to check a few advanced Incoming and Outgoing settings and modify them if needed.
For additional Incoming Server settings:
Click on the Mail menu and select Preferences.
Click on Accounts and select the appropriate email account on the left side bar the you just created.
In the right-hand section, click on the Advanced tab.
Settings should be similar to the window below.
Make sure Use SSL is unchecked.
For additional Outgoing Server settings click on the Account Information tab and drop the menu down next to Outgoing Mail Server (SMTP) and click Edit Server List….
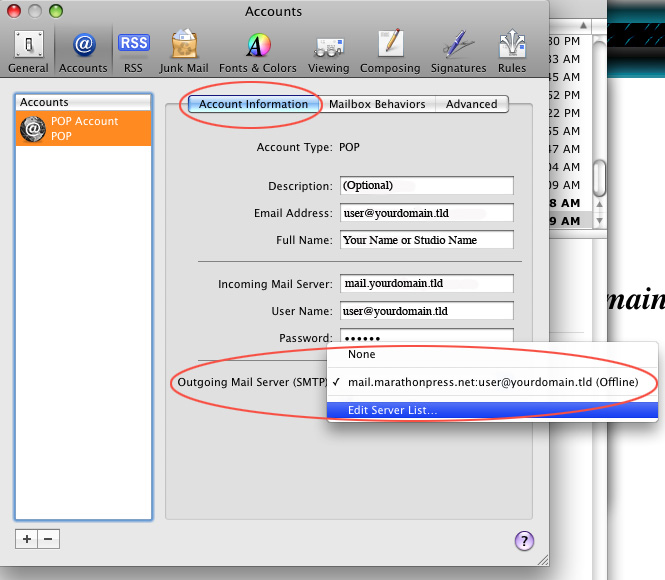
Select your new email account you just created based on the Description name you gave the account or Server Name.
Click the Account Information tab to verify/modify your Description and Server Name. Do not click OK yet.
Click on the Advanced tab.
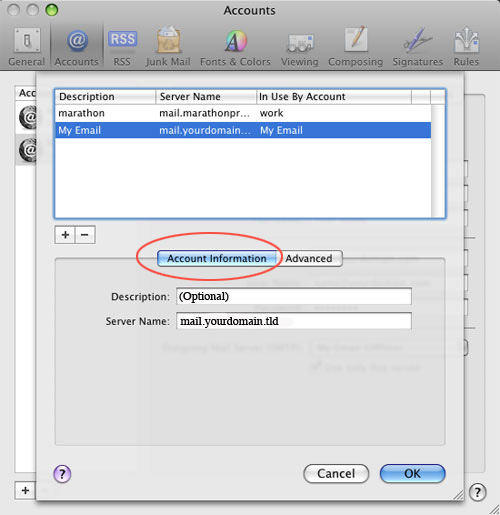
Make sure your settings are the same as the graphic below.
Change the default Server Port from 25 to 7625.
Make sure that Use Secure Sockets Layer (SSL) in unchecked.
Authentication: From the drop down menu select Password.
User Name: Enter your full email address example@your domain name.
Password: Enter the password you were given for this account.
Click OK.

Click on the General tab at top left, when prompted, click Save to save your changes.
That’s it, your account should now be working properly.