

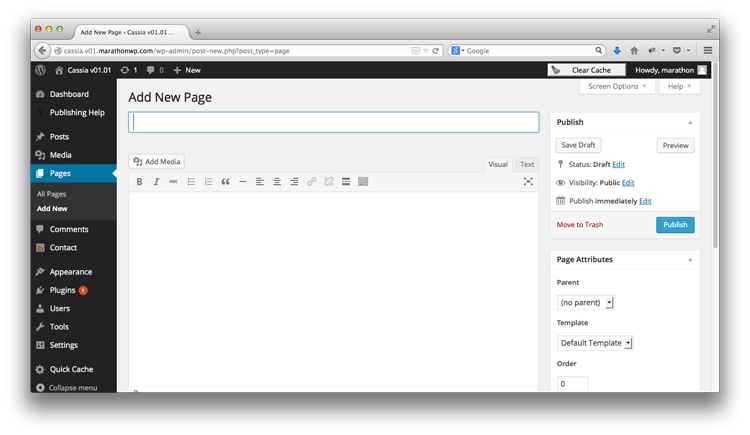

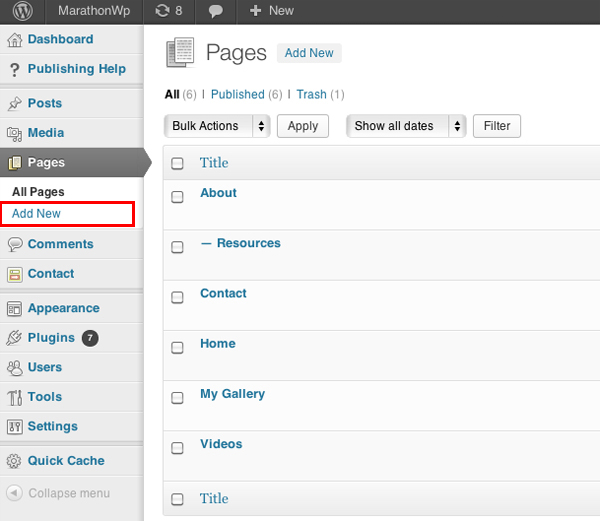
First, click Pages on the left hand side to bring up the full list of your website’s pages.

Click Add New to create a new page, on which you will place your gallery.
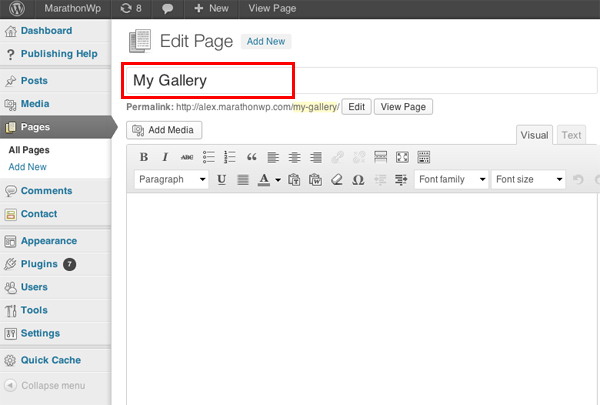
In the Title area, type in the name of the gallery.
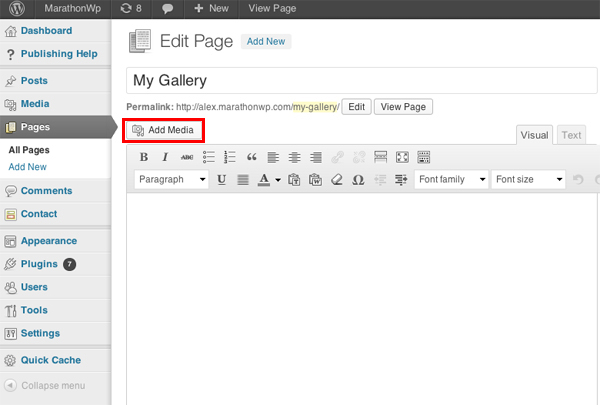
Click on Add Media to upload the photos for your new gallery.
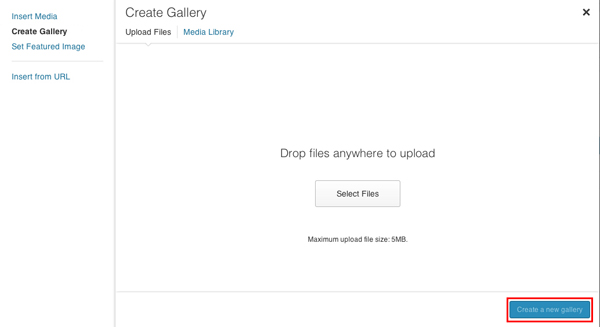
On the left hand side of the window that pops up, click on Create Gallery.
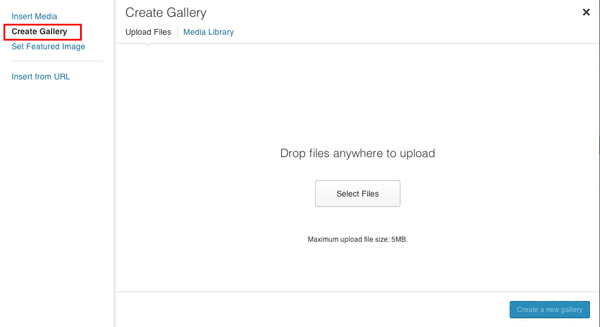
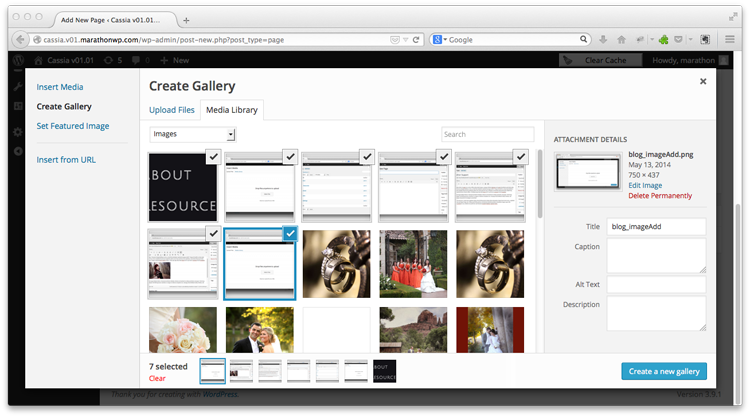
Here you have two options:
- Click on Select Files
- Drag and Drop your photos in the window
After the photos have uploaded, click on Create a new gallery in the bottom right of the window
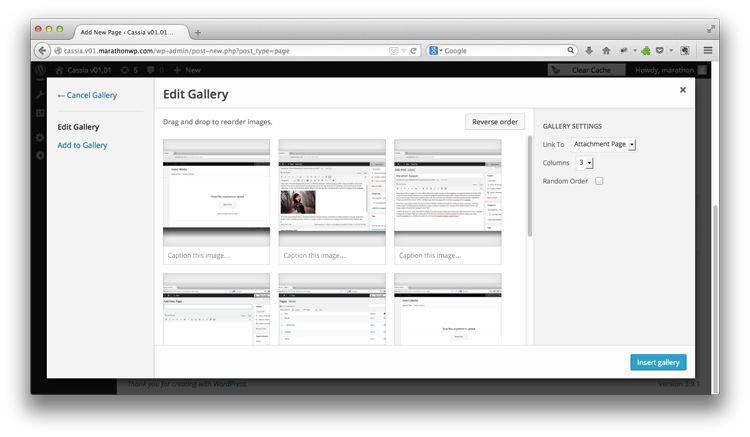
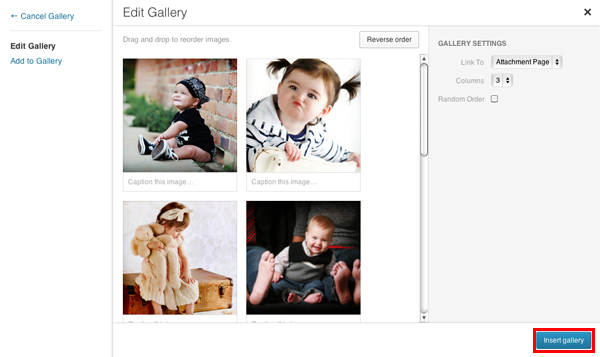
In the next window, you can change the order of the images by simply dragging the image to the position you want it in.
Once you have the order of image you prefer, click on Insert Gallery to add the gallery to the page
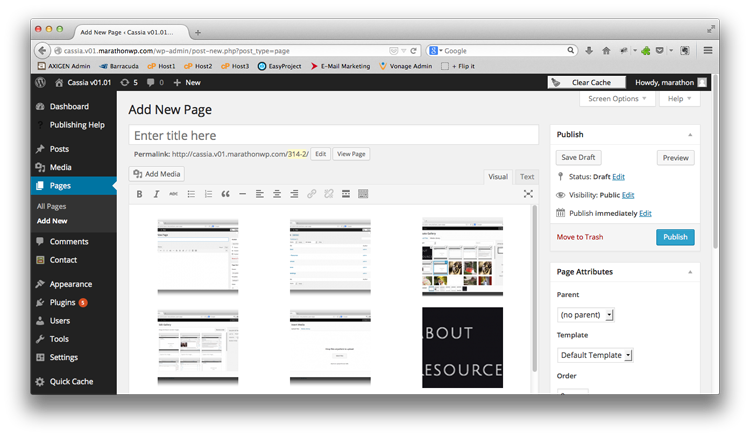
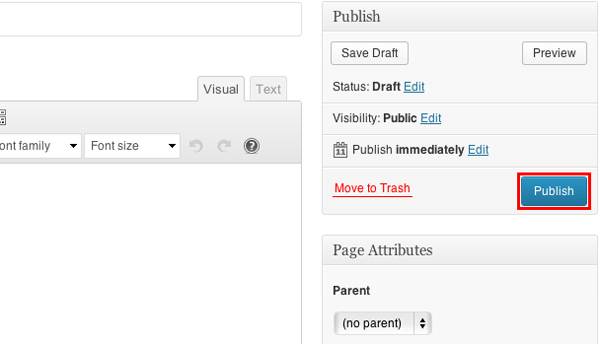
Now that the gallery is inserted, you should see a large blue box in the editor area. To finalize your gallery and publish it, click the Publish button on the right hand side
Because you created a new page for your website, you will need to add it to your menu, if you want your viewers to see it. For more information, view our Menus tutorial here