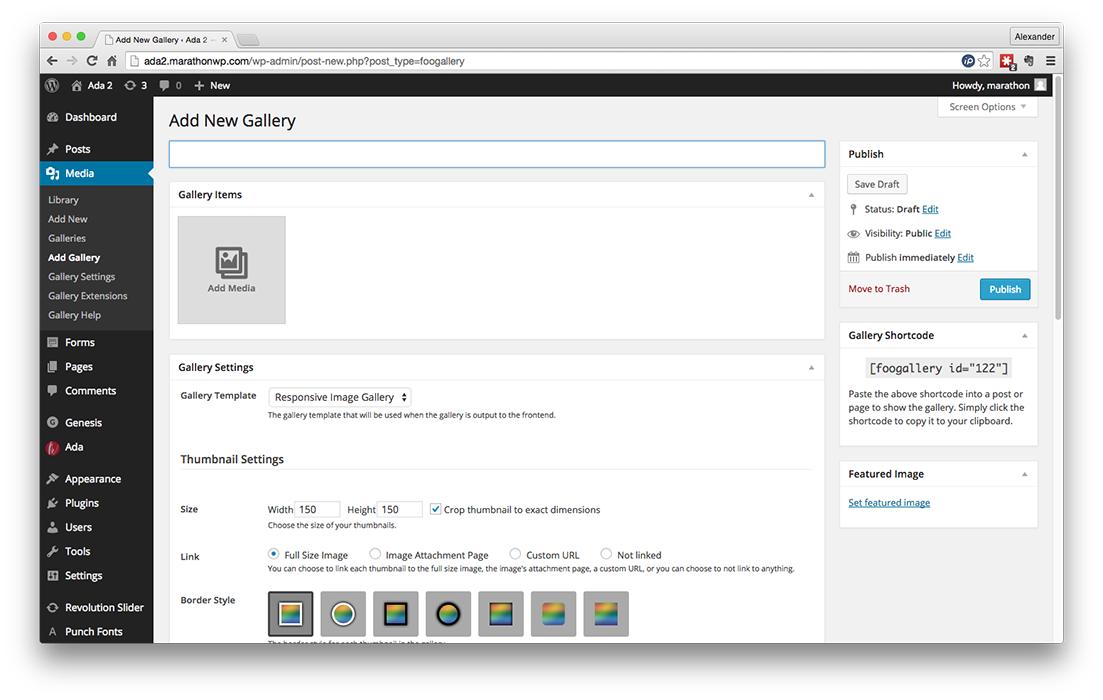
Hover over ‘Media’
and click ‘Add Gallery’
Enter the title for your gallery
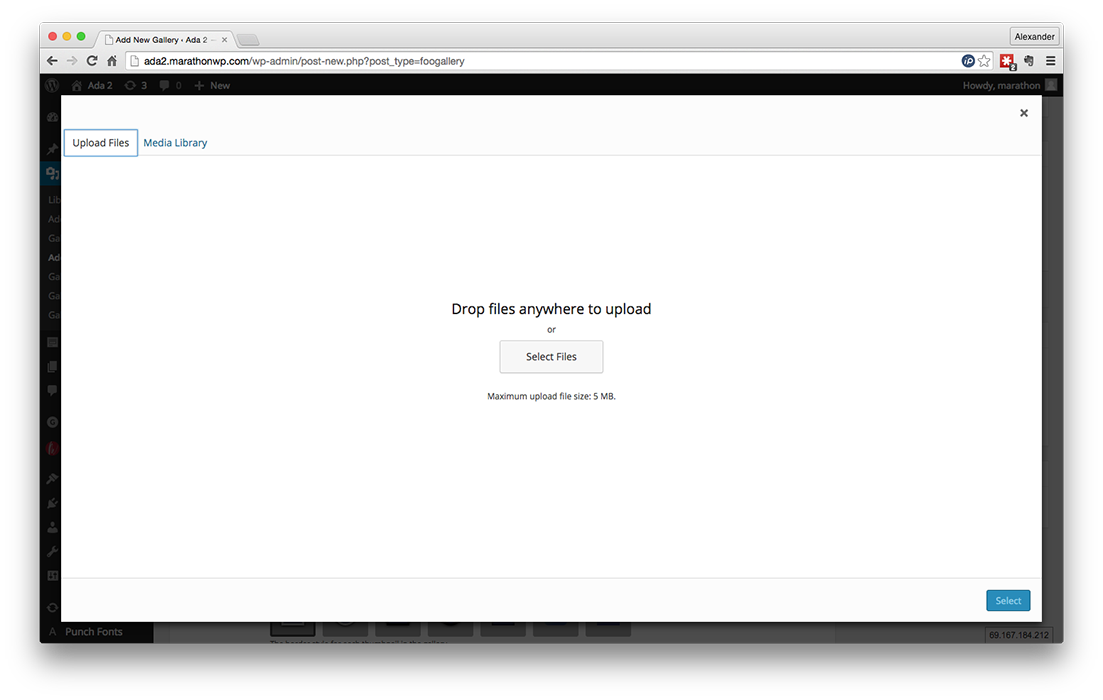
Click ‘Add Media’ to start uploading images

Drag your images into the window, or click ‘Select Files’
Images should be sized to about 1000 pixels wide or tall and at 72ppi

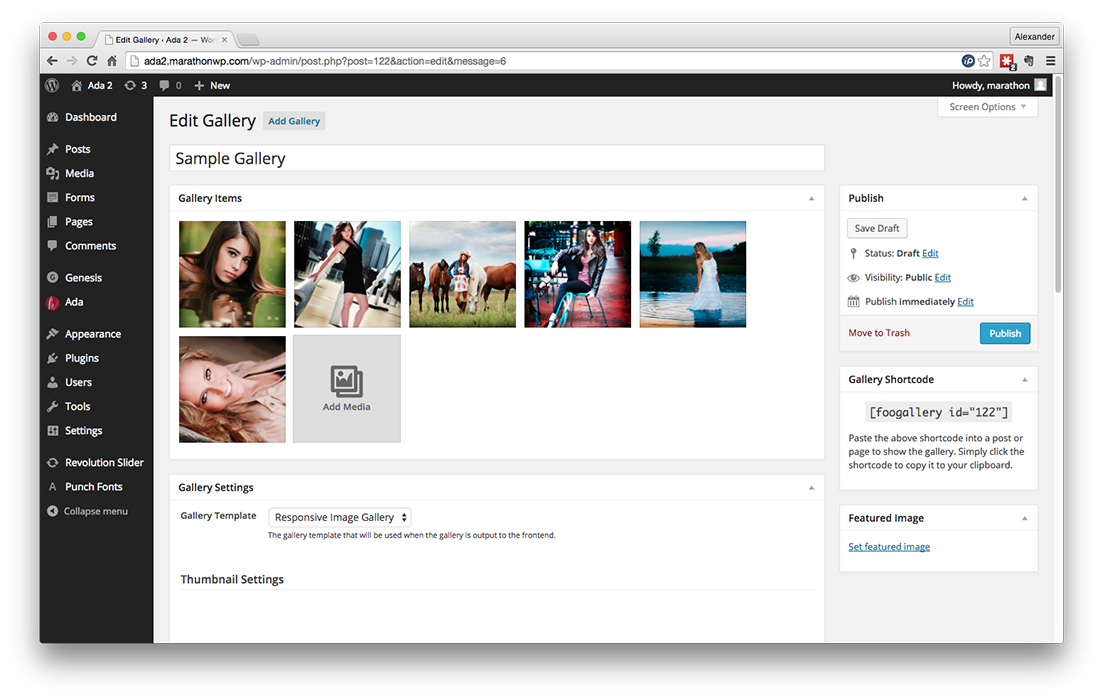
Drag and drop your images
in the order you want them
You can change advanced gallery
options by scrolling down to the
Gallery Settings section

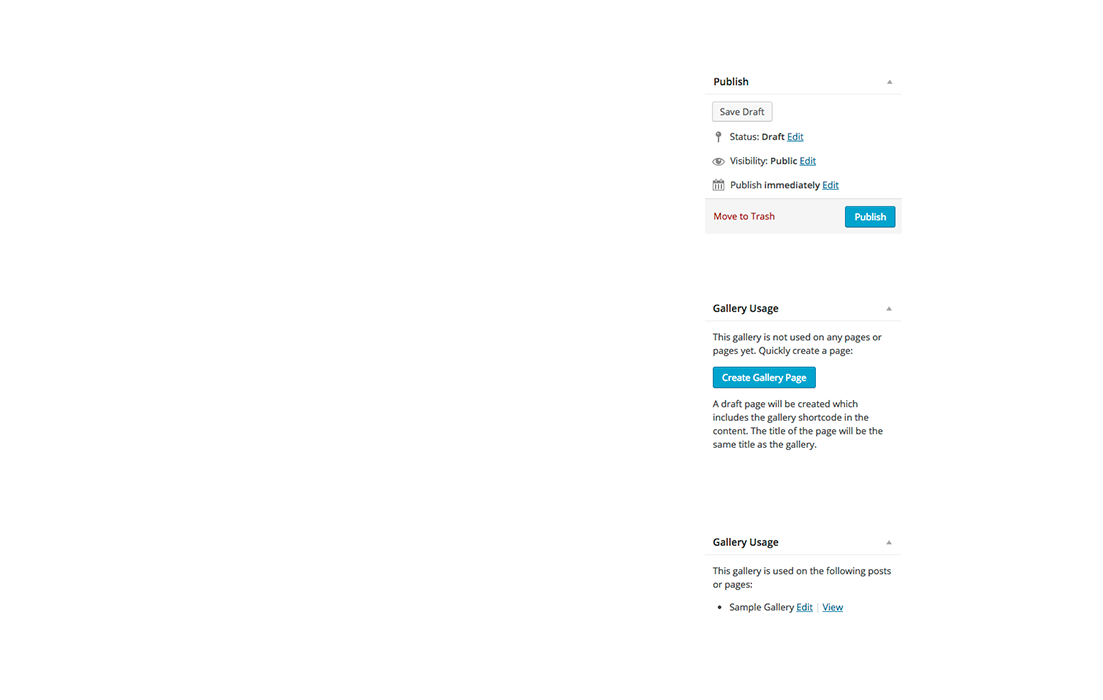
In order to make your gallery usable, you will need to click ‘Publish’ to finalize it
Below the Publish option, you will need to click ‘Create Gallery Page’
After clicking ‘Create Gallery Page,’ hover over the name, and click ‘Edit’
You will need to click ‘Publish’ one more time after that to add the gallery to the page
You have now created and added a new gallery to your website! The next step will be
to add it to your menu, so your customers can view it!
Click here to find out how!
If you have any questions, please feel free to call Web Support at
1.800.228.0629
Phone Support Hours:
Monday – Friday, 8:00am – 5:00pm, CST
