
Posting An Image
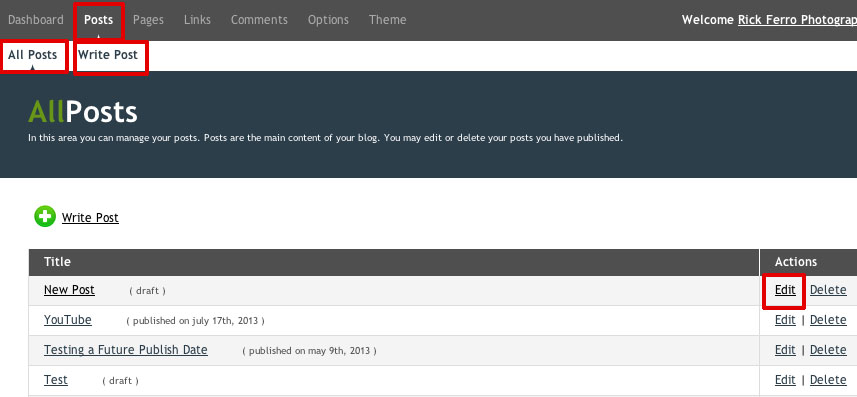
To create a new blog entry, click “Posts > WritePost”. To edit an existing post, click “Posts > All Posts” then click “Edit” next to the desired post.
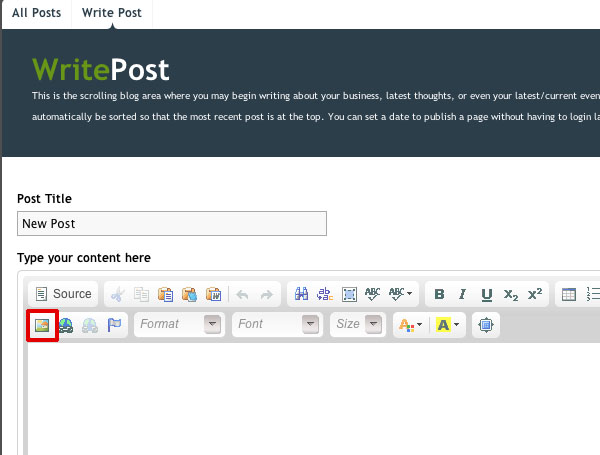
Once you create a new post or edit an existing post, you will see a menu bar above the content box that allows you to bold, italicize, link, etc. Make sure the image you want to insert has already been resized in photoshop and that your cursor is where you want the image to be. Click the “Insert/Edit Image” icon to insert/browse for an image. (The icon looks like mountains.)
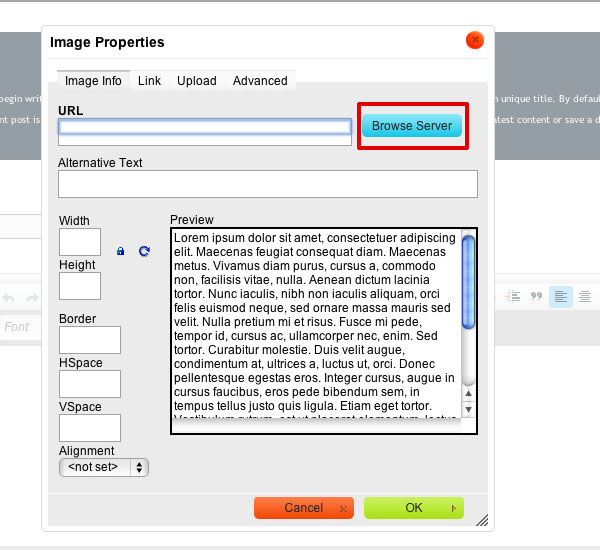
The Image Properties dialog box will open. Image Info tab – click “Browse Server” button to both view and/or select an image you have previously uploaded.
The following screen will display. Click on Upload to upload a new image from your computer.
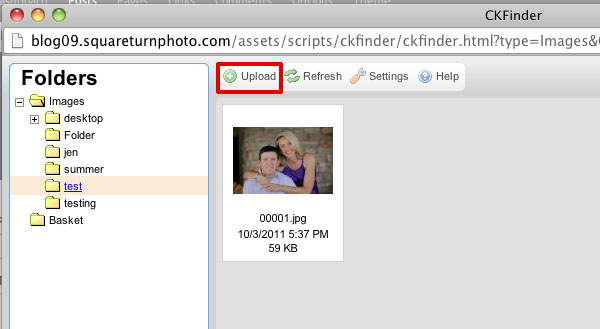
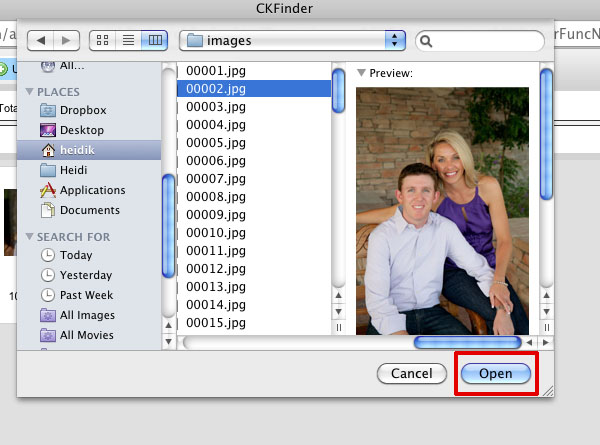
Browse to the image that you want to upload, select it by highlighting it and click on Open.
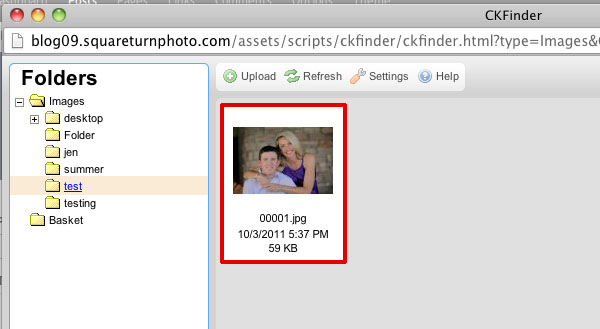
The image is now in the library. Just double click on the image that you want to insert into your blog post.
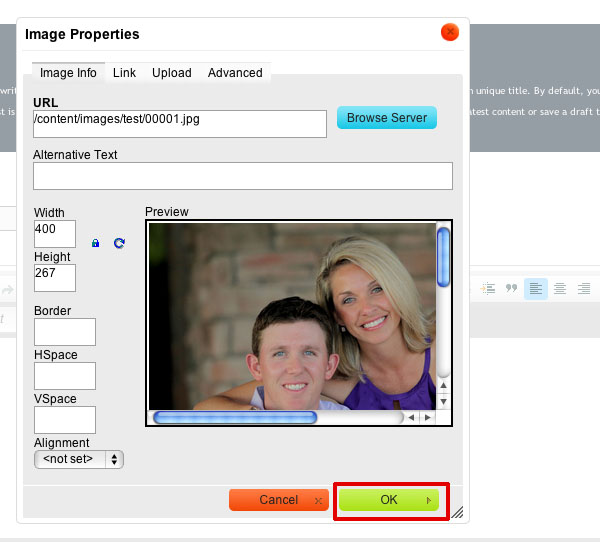
On the screen that comes up you can edit the image properties, then click on OK to insert the image into the blog post.
Link tab – you can type in the URL address if the image is stored elsewhere on the Internet and not within your blog.
Advanced tab – Usually you do not need to use this tab for images.
You must make your filename “server friendly” by removing any spaces, apostrophes, slashes or other non-alphanumeric characters ($,%,&, etc.) before uploading.